Flesh Wounds
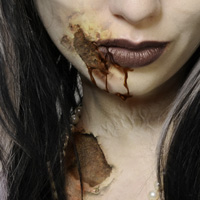 For the final installment of Photoshop Zombie, we will be upping the horror-factor with the creation of flesh wounds and blood. By using textures we can replicate torn skin, crust and gouge marks, but it’s definitely an exercise in subtlely. Texture layers can often have a ‘flattening’ effect on the layers underneath, so the key is to use layer masks to effectively blend these elements into the composition.
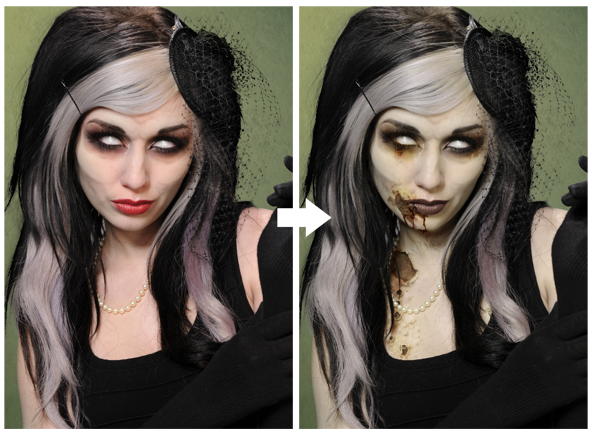
Changing the Hue
The first step I took here was to reduce the hue of the model to take away the healthy pink colour of her skin; I selected the model and created a new Hue/Saturation Adjustment Layer above all the existing layers (see Adjustment Layers tutorial to learn more). See the screenshot below to check out the values I used, with your own settings adjust to personal preference and taste. I set the Adjustment Layer to Color Layer Mode and the Opacity to 85% so the adjustment doesnt wash out all the colour below it.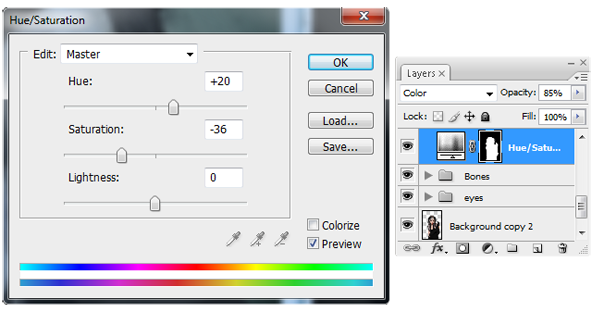
Lets Rip Flesh!
I tend not to use texture layers that much these days, but in the creation of Zombies – they are very useful. When thrown on indiscriminately, they look awful – but with a light touch, you can get some decent effects. Head over to Mayangs Textures to get a quality selection of free images for your Zombie. The thumbs below shows the various textures I used to create the wounds, crust and gouge marks for my version: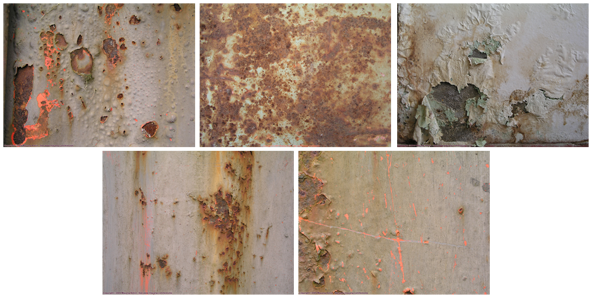
First up, create a new Layer Group for your wounds – make sure it is at the bottom of your layer stack, I called mine ‘wounds’. Paste one of your texture images into the new Layer Group and set the layer to Hard Light mode. Check out the pic below to see how things should look:
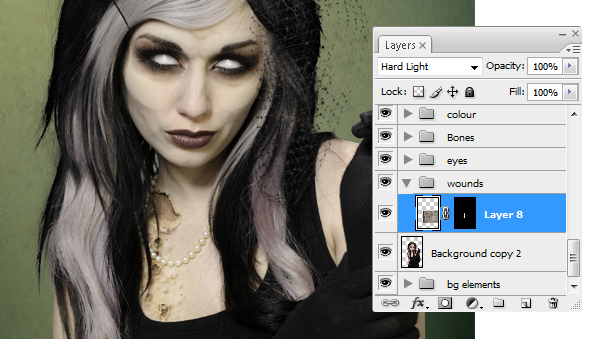
As you can see, Ive applied a layer mask to my wound texture layer. By using layer masks, you can blend in the texture elements and control the intensity of the effect. There are a lot of things to consider when placing your wounds; you may want to change the size (Edit > Transform > Scale), rotate the wound (Edit > Transform > Rotate) or even lessen the intensity of the colours using Hue/Saturation (Image > Adjustments > Hue/Saturation). The worlds your oyster.
Soft brushes are essential when working with your layer mask, for more natural transitions use a very large soft brush (B) and use only the edge of the brush to gently ease in the blends. Working with Layer Masks is an artform in itself, and lots of practice is the key to success.
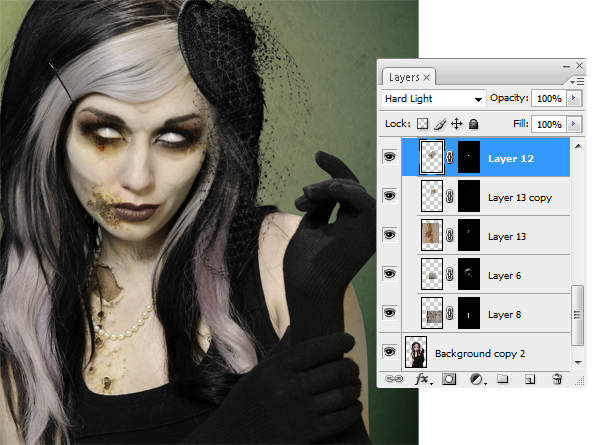
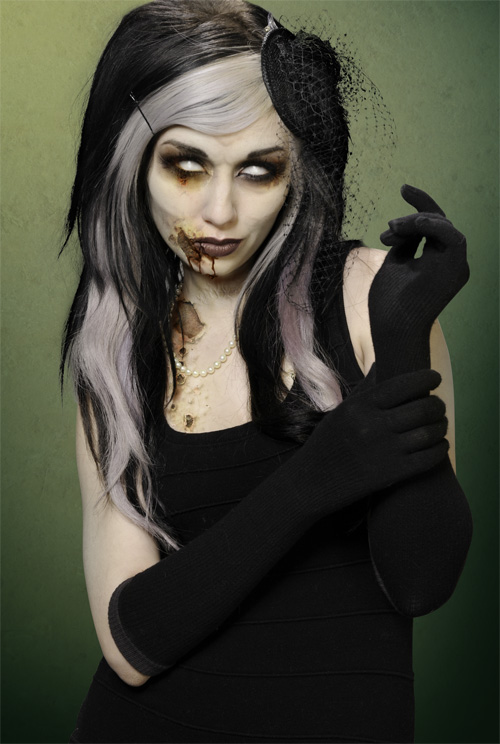
Repeat the above steps and continue to work in different wound elements with new layers set to Hard Light and blend as necessary with Layer Masks. As you can see, it’s starting to come together nicely now and she’s starting to look pretty grody 
Wound Definition
It’s always great to get your hands dirty and throw in some digital painting techniques. With my wounds, there were some parts that I wanted to accentuate manually – so I got the Lasso Tool (L) and started to draw out some elements on a new layer set to Multiply. Using the Smudge Tool (R) set to around 25% strength, and soft edge brush – work around the jaggy edges of the shapes created by the Lasso and manipulate to your liking. Use a soft edged eraser (E) to ease in the edges, lessening the intensity where required.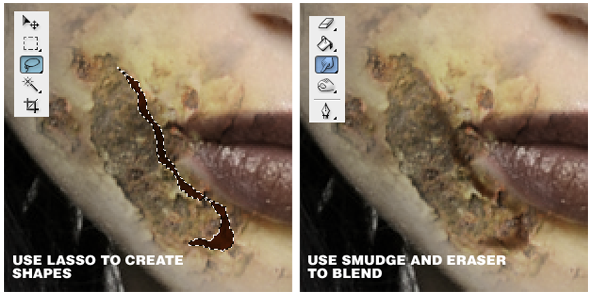
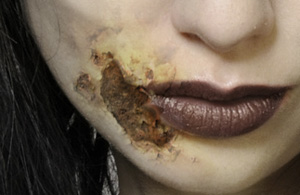
Creating elements manually is what seperates the ‘men from the boys‘ so to speak – digitial painting is awesome and really makes your work unique. After a fair amount of tinkering with the above techniques I came to this point:
More Blood Pls
There are superior methods for creating realistic blood online, but for some reason I always struggled with the walkthroughs. So here, for your viewing pleasure is the ‘Quick n Dirty‘ SurrealPSD blood method!1. On a new layer set to Multiply, create selections with Lasso Tool (L) and fill with a blood colour of your choice. Smear the edges using the Smudge Tool (R), with a light strength (around 30%)

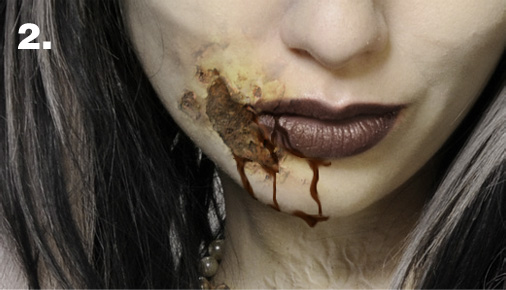

Result:
Review
That’s it for Photoshop Zombie! I hope you enjoyed the walkthough, please feel free to share online. Watch this space for new tutorials on lighting, biomech techniques and much more!Conzz
Tidak ada komentar:
Posting Komentar