Skeletal Features
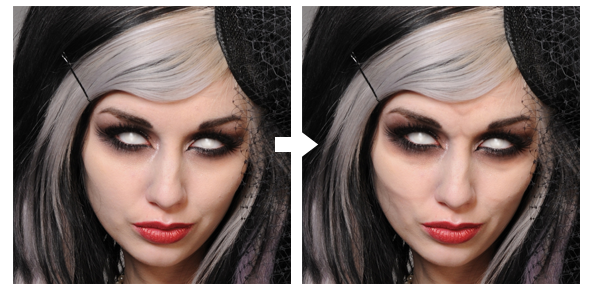
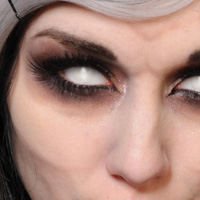 In this installment of Photoshop Zombie, we will be working on the bone-structure of the model, bringing out skeletal features using simple lighting techniques. This is a great step in the overall process because you can literally sculpt the expression of the model’s face by accentuating the brow using highlights and shadows. Read on for the skinny!
Sketching the Bones
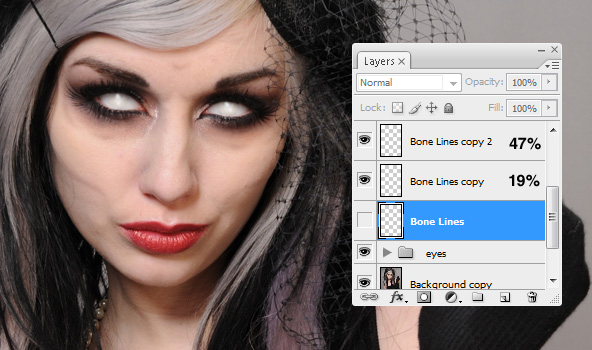
As you can see from the image below, I have taken all my layers and adjustments from the previous tutorial and placed them in one group called ‘eyes’ – nice and neat. The first step for creating your skeletal features is to create a new layer, set to Multiply. Using the Eyedropper tool (I), select a dark tone from the models skin, and draw out some bone outlines using your preferred method. I like to use the Pen Tool (P), because I can keep everything nice and sharp. The idea here is to work around the existing contours of the image – check out some reference pictures of skulls to get an idea of how the cheek bones and sockets look. I named this layer ‘Bone Lines’.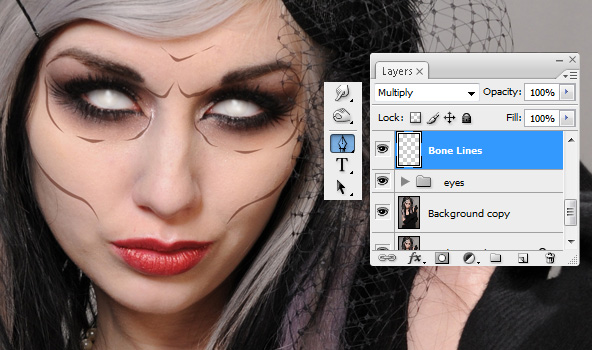
Once you have created the contours, duplicate your ‘Bone Lines’ layer (right click layer, select ‘Duplicate Layer’), and hide the old one as shown in the image below. With your new ‘Bone Lines copy’ layer, apply a slight Gaussian Blur (Filter > Blur > Gaussian Blur), my blur settings were 3 pixels. Hopefully you should have something similar to this:
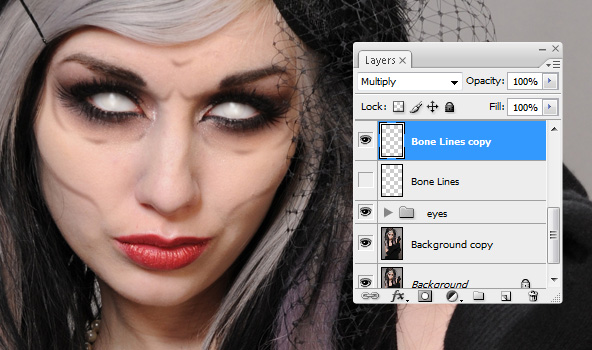
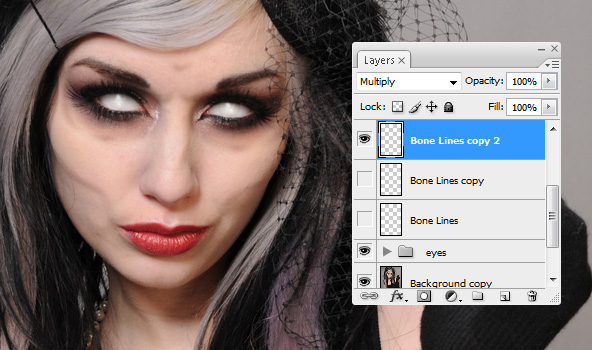
This next step is similar to the last – duplicate the ‘Bone Lines copy’ layer, and hide the one underneath (check out the example to see how your layer stack should look). With this new duplicated layer, which should be called ‘Bone Lines copy 2′ – apply a Gaussian Blur, this time a bit more than the last one – I used a value of 4 pixels.
Burn Baby Burn
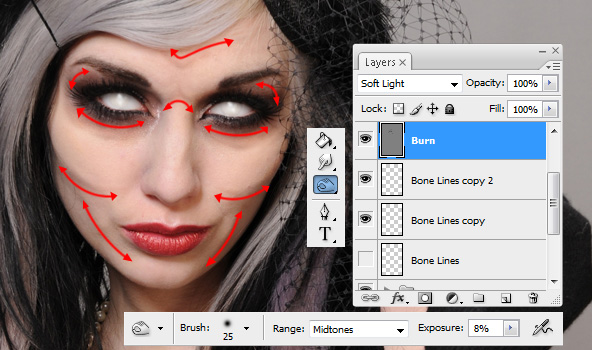
With the vague outline of the bone-structure in place, it’s time to work over the skin with the good ol’ Burn Tool. As opposed to just hacking away at the original source image, we will use a non-destructive method to apply the burn effects – that way if any mistakes are made, they can be easily rectified.
Create a new layer and name it ‘Burn’, fill this layer with 50% Gray (Edit > Fill > Select 50% Gray from the dropdown menu) – set this layer to Soft Light layer mode. Using the Burn Tool (O) with a soft edged brush, go over the bone contours on your new ‘Burn’ layer. Use different Exposure settings for getting the desired effects, my Burn Tool was mainly set to 8% Exposure, using the Midtones Range. Subtlety is key here, it’s quite easy to overdo it. The great thing about working on the Soft Light layer, is that you can erase any mistakes using a 50% Gray brush – a lot trickier to do if you were burning directly onto the source image.
Highlights
Bones jutting out of the model’s face would catch the light, so for this step we will create some highlights. Create a new layer above your ‘Burn’ layer and set the layer mode to Soft Light. Sample a light flesh tone from the model’s face using the Eyedropper Tool (O), and with a soft-edged brush, paint onto the raised areas of the bones. I used the Smudge Tool (R) to make the strokes more natural, and at times I used the Eraser Tool (E) to soften the intensity of the strokes. Pay particular attention to the cheek bones and the brow, as they’re more pronounced,and would catch more light.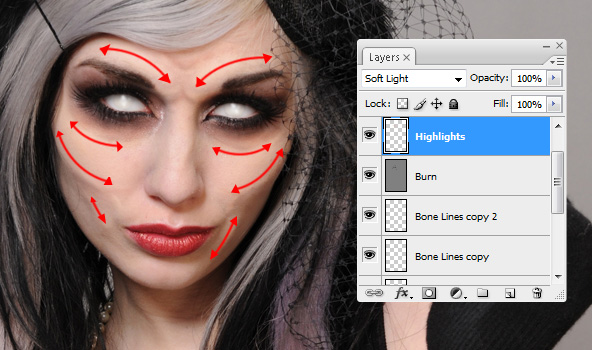
Finishing Touches
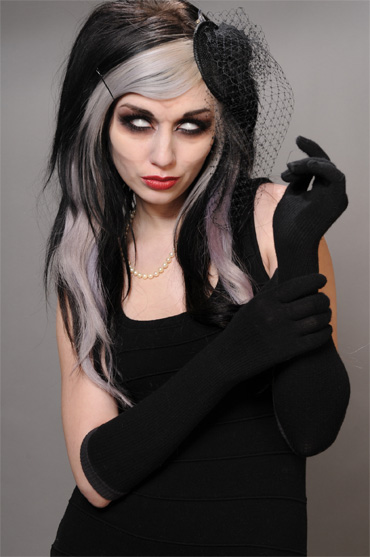
You may want to tweak the opacity of each layer until you find the right balance – I reduced my ‘Highlight’ layer to 40%, so the highlights weren’t as prominent. You can use these techniques to do further work such as wrinkles, contours and creases; as long as you keep lighting and shadows in mind, you should be able to achieve great results.The Result:
Review
You have been viewing Photoshop Zombie, head on over to check out part 3 ‘Flesh Wounds‘.Conzz
Tidak ada komentar:
Posting Komentar